Generate Custom Reports
Gusto provides the capability to create custom reports using custom columns, groupings, and optional filters.
1. Create custom report
To create a custom report through the Gusto API, use the POST companies/{company_uuid}/reports endpoint.
The endpoint accepts the following body params:
columns- This is a list of columns to include in your report, in the order they are requested in the array.- In some cases, a single value in
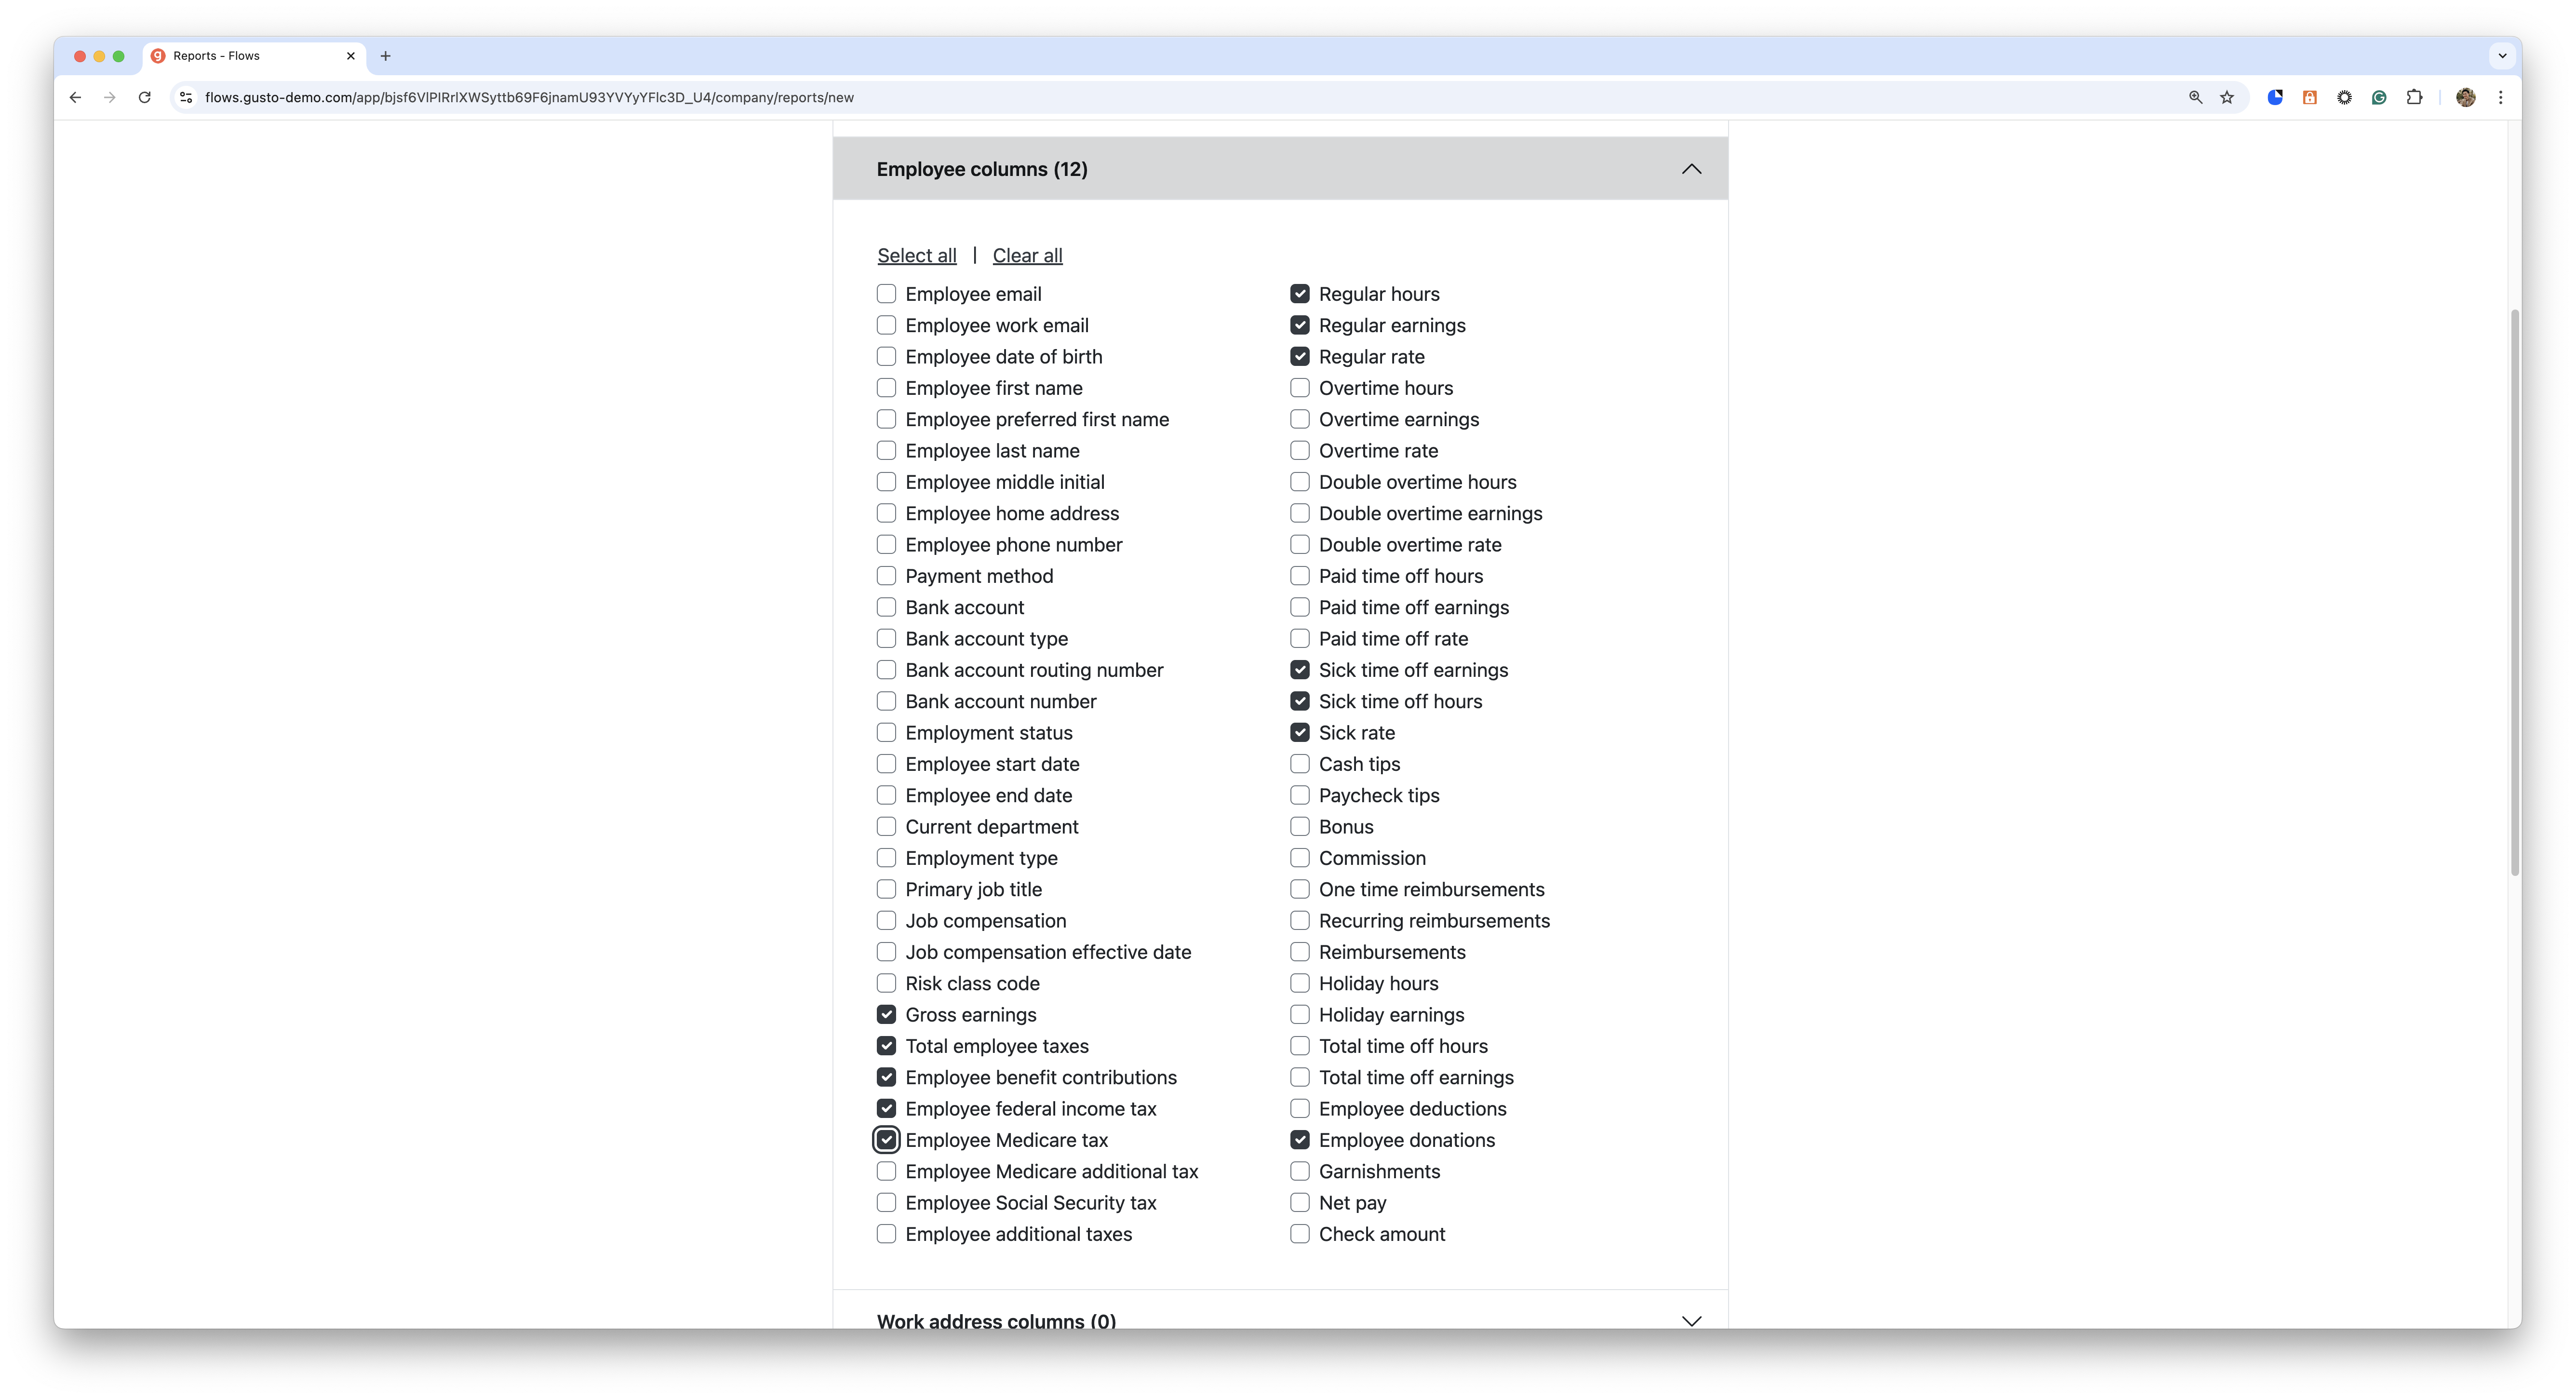
columnscause multiple columns to be added to the resulting report.employee_additional_taxes,employer_additional_taxes,employee_benefit_contributions, andemployer_benefit_contributionswill all result in a variable number of columns in the report, detailing the amounts for various kinds of taxes & benefit contributions, depending on the employer's configuration. - Columns starting with
total_(such astotal_employer_benefit_contributions) will include only a total in a single column, and will not include details on all sub-items that comprise the total.
- In some cases, a single value in
groupings- How to group the report. Use this field to create reports structured by payroll, employee, or work address with any combination or order. Some of the columns and filters require certain groupings in order to create the report. For example, employee information such asemployee_emailand employee filters such asemployment_statusrequire theemployeegrouping.file_type- This is the file type of the report URL that gets generated.custom_name- Title of the reportwith_totals- Whether to include subtotals and grand totals in the report, this is defaulted tofalsestart_date/end_date- This is the time period to filter the report by.- If no values are provided, the time period is defaulted to all-time.
- If only the start date is specified, the time period will be after the start date.
- If only the end date is specified, the time period will be before the end date.
- If there is payroll information, this filter uses the payroll end date to filter the time period.
- If there is employee information, we filter to employees that were active during this time period.
- If there is work address information, we show work addresses that were associated with employees during this time period.
- If no values are provided, the time period is defaulted to all-time.
dismissed_start_date/dismissed_end_date- Dismissed employees’ time period to filter the report by- If only the dismissed start date is specified, the dismissed time period will be after the start date.
- If only the dismissed end date is specified, the dismissed time period will be before the end date.
employment_status- Filter by the employee employment status, ex:active,dismissed, etc.'employment_type- Filter by the employee employment type, ex:exempt,non_exempt, etc.payment_method- Filter by payment method,checkordirect_depositdepartment_uuids- Filter by the departments employees are assigned toemployee_uuids- Filter by the company employeeswork_address_uuids- Filter by the work addresses employees are assigned to
The response will contain the following information:
request_uuid- A unique identifier of the report request (to be used in Step 2 to fetch the report)company_uuid- company UUIDcustom_name- Title of the reportfile_type- file type requested
2. Get report
To get the report, use the GET /reports/{request_uuid} endpoint using the request_uuid returned from Step 1.
The response will contain the following information:
request_uuid- A unique identifier of the report requestreport_urls- an array that is either empty when status: pending or failed, or contains the URL of the report when"status": "succeeded"status-pending,succeeded, orfailed
Once Step 1 is successful, repeatedly poll this endpoint every few seconds to verify whether the report has finished generating. The terminal state will always be either succeeded or failed.
3. Get report template (optional)
Before Step 1, use the GET companies/{company_uuid}/report_templates/{report_type} endpoint to get a recommended list of columns and groupings to use to create a report. We currently only support payroll_journal as a report type, but will continue to support more in the future.
The response will contain the following information:
columns- A list of recommended columns to usegroupings- A list of recommended groupings to usecompany_uuid- company UUIDreport_type- type of report template
Flows Guide
To get started, generate a reports flow via API call to our Flows endpoint.
cURL
curl --request POST
     --url <https://api.gusto-demo.com/v1/companies/{{company_uuid}}/flows>
     --header 'Authorization: Bearer {{access_token}}’'
     --header 'Content-Type: application/json'
     --data ' { "flow_type": "reports" }'
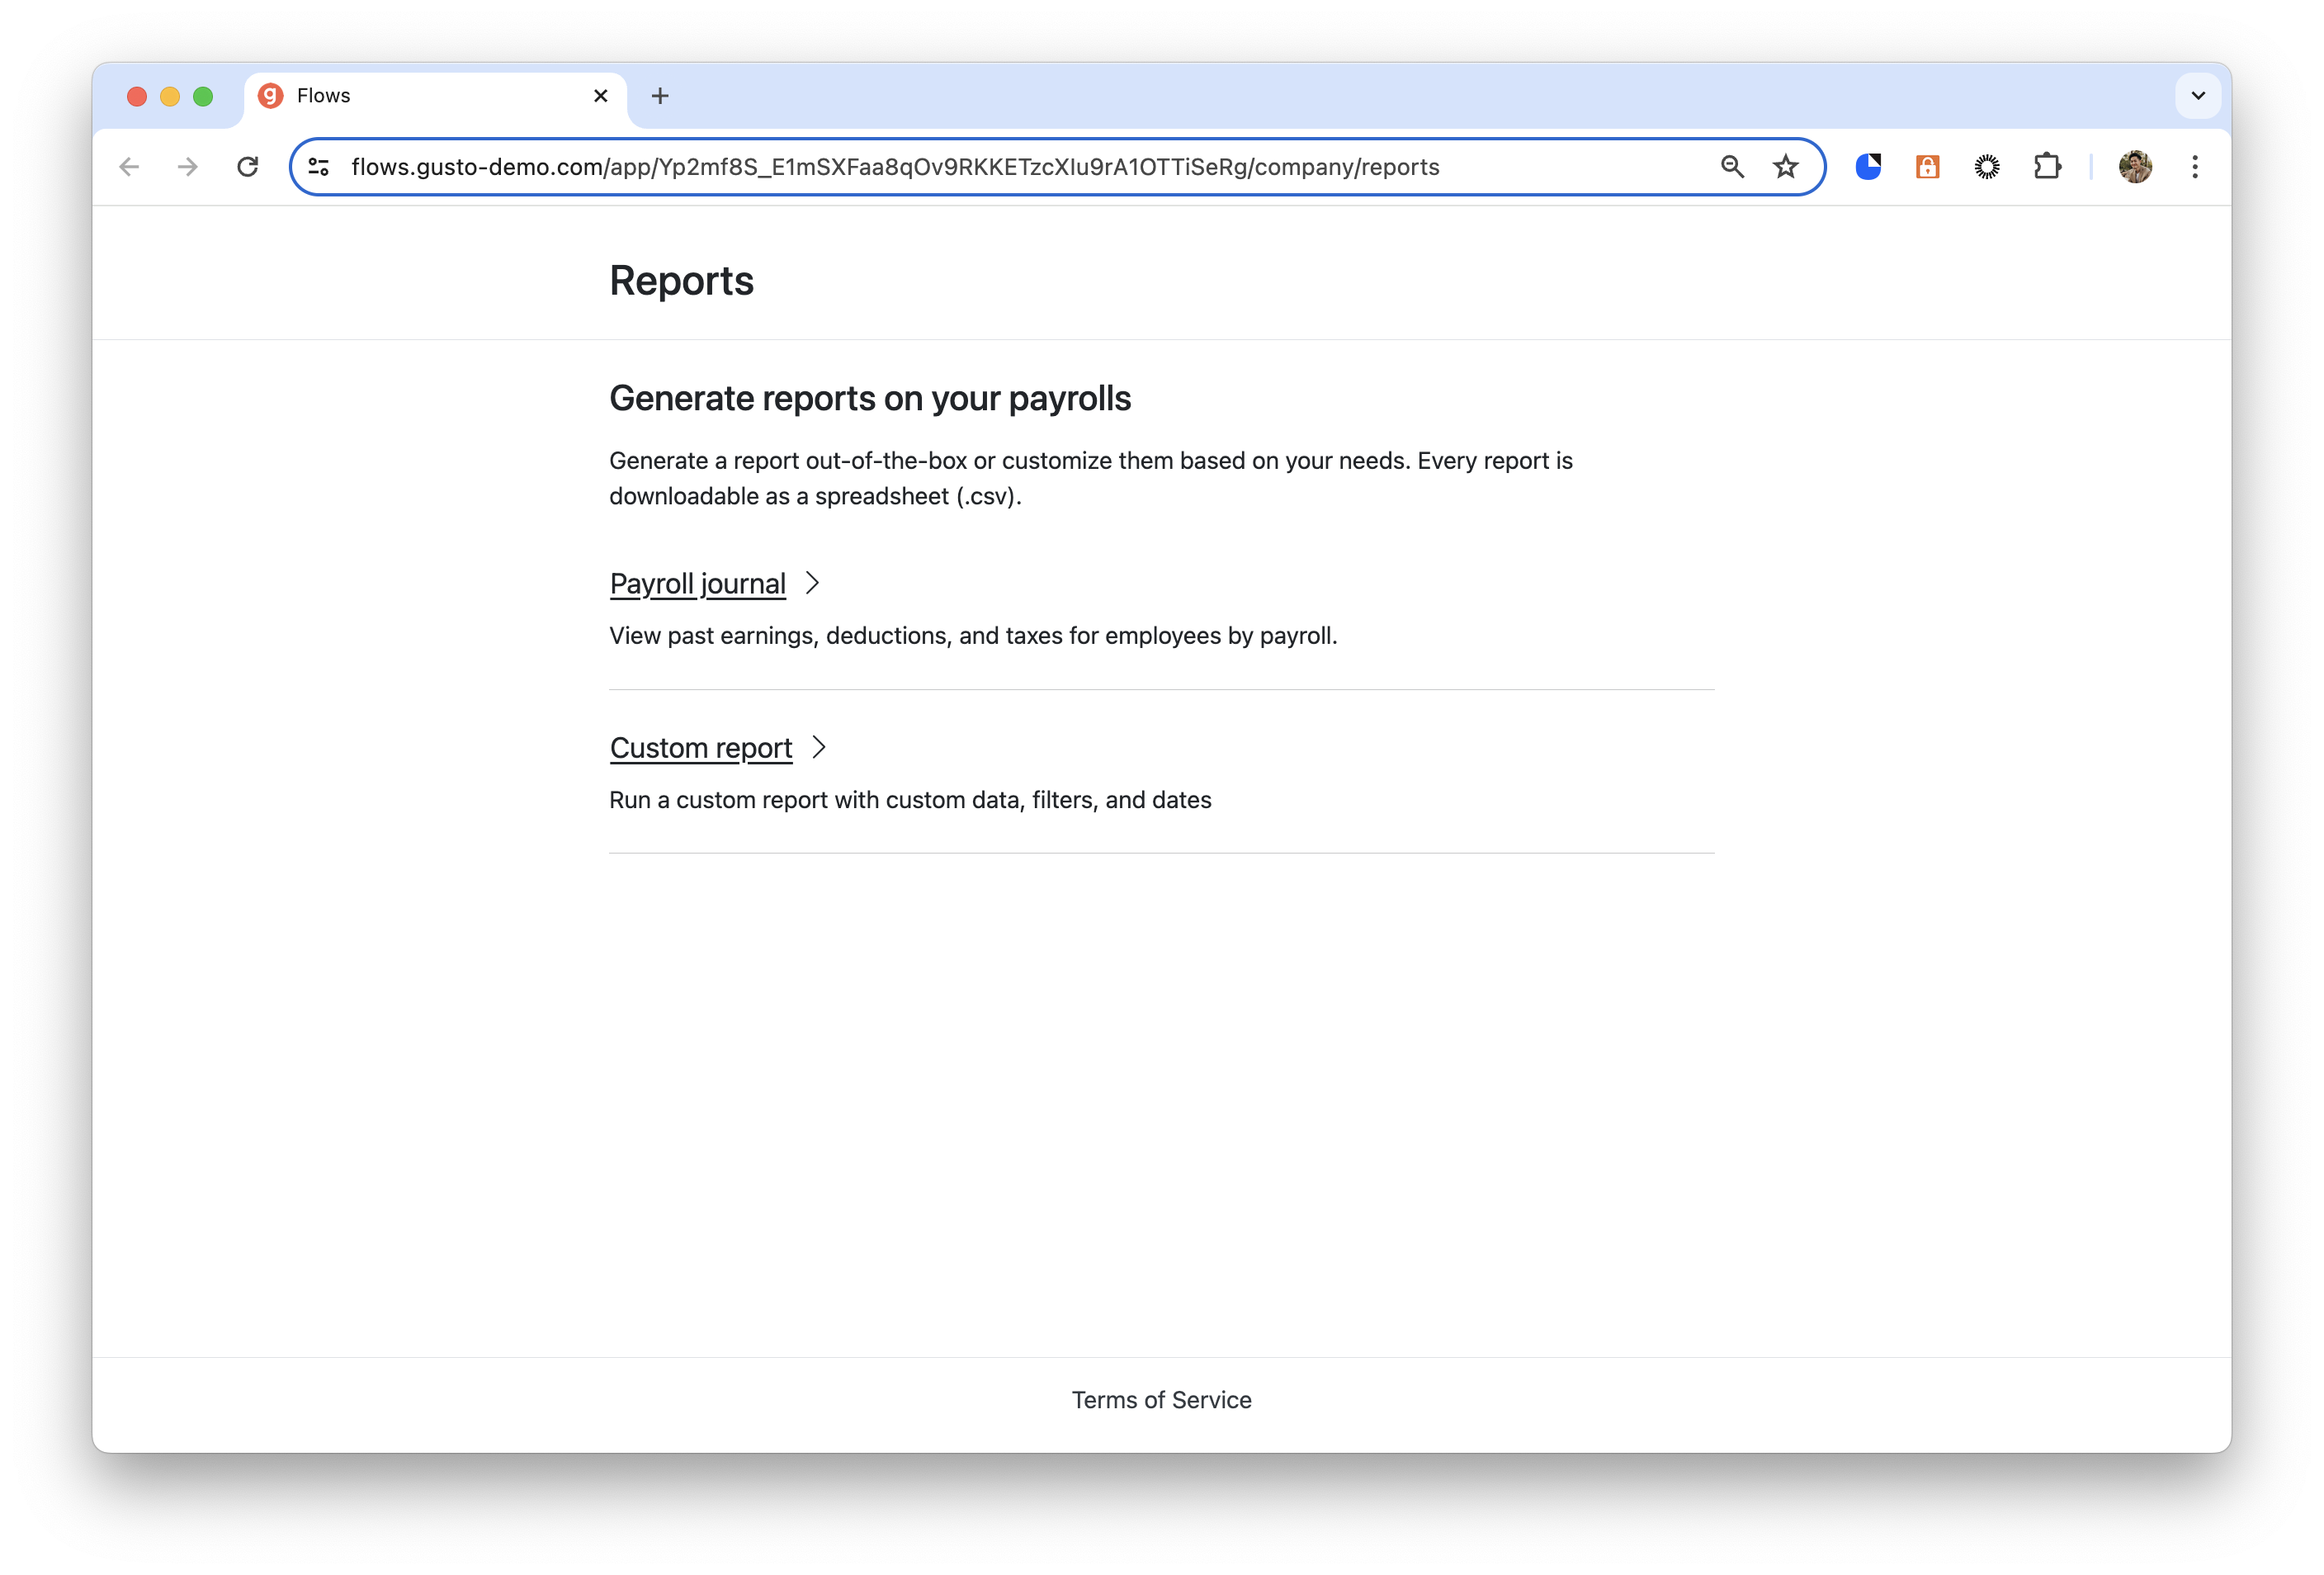
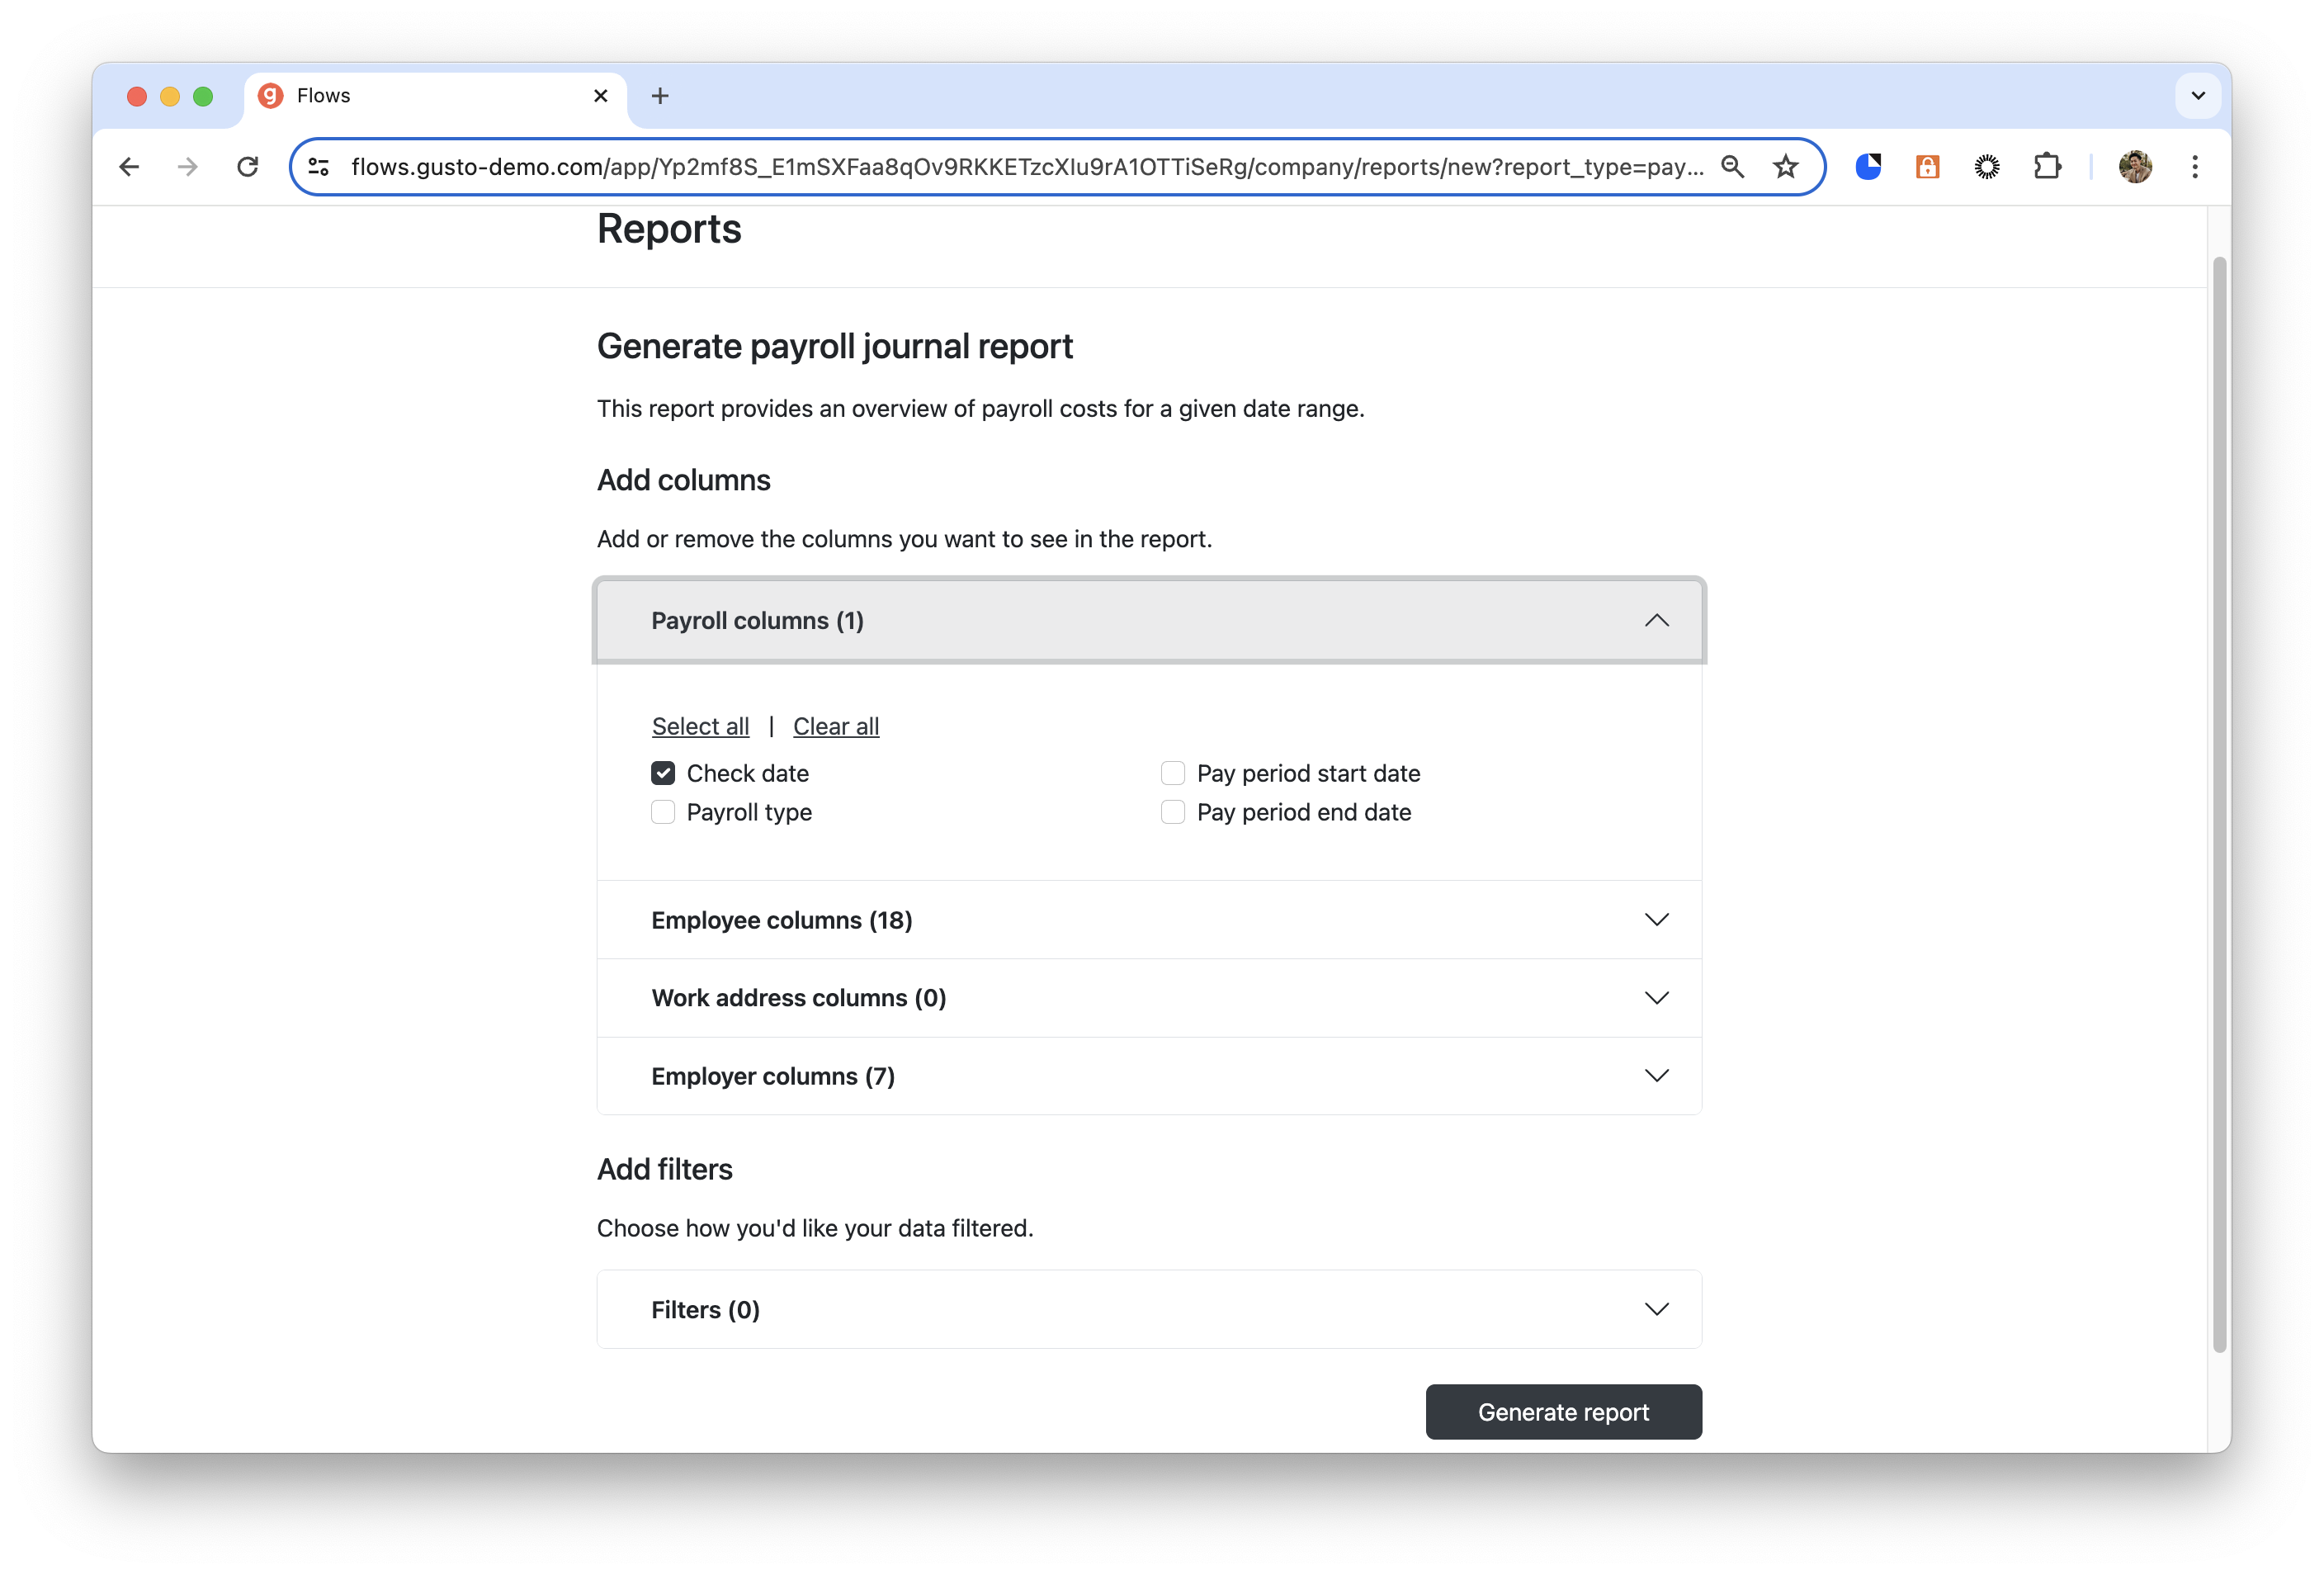
From the landing page, either create a report using our payroll journal template as a starting point or completely from scratch. From there, we grouped the columns based on Payroll, Employee, Work address, and Employer for easier access. This way, we have pre-grouped the columns to their required groupings. Then, add any optional filters to the report for more customization. Finally, click on Generate report to download the report.


Updated 2 months ago